3 Basic Techniques to Start Modeling with SIO-2 PLUS®

Have fun with your loved ones while creating with SIO-2 PLUS®, the natural air-drying clay. We’ve put together three essential techniques to help you get started with modeling — each with a simple, hands-on project. Grab your tools and let your creativity flow!

Technique 1: Coils

Create your own pencil holder with unique shapes.

Level: Easy
Estimated time: 1 h 30 min
Tools: Spatula, scoring tool, brush, paint or varnish

Learn the coil technique by rolling strips of clay and shaping them creatively. It’s perfect for beginners and super fun! In this project, we’ll show you how to make a practical and decorative pencil holder — ideal for keeping your colors within easy reach.

To make the base, roll a coil of clay and smooth the surface by gently pressing with your fingers.

Stack coils of the same size one on top of another to build the walls.

Every two or three coils, smooth the inside and outside with your fingers or a spatula to strengthen the structure.

Mark the desired height for your pencil holder and trim the top edge carefully.

Smooth the entire surface using a damp sponge or a soft tool for a clean finish.

You can decorate the outside with small modeled pieces. Moisten the contact areas well before joining. Once dry, paint with acrylics or apply varnish for protection and color.

Technique 2: Modeling

Bring to life a fun little character made by hand.

Level: Intermediate
Estimated time: 2 h
Tools: Spatula, brush, paint or varnish

This technique introduces you to sculpting more complex shapes. Learn how to model the body parts and assemble them with care. The result? A fun figure you can customize however you like. Perfect for sparking creativity!

Shape the arms and legs using coils. Leave one end pointed to make attachment to the body easier.

Use a thin clay slab to create pants and sleeves.

Model the hands and feet separately, and attach them carefully to the limbs.

Make two balls (one for the body, one for the head) and join them by pressing. Reinforce the connection by wrapping it with a coil and smoothing it out.

Attach the slightly dry legs to the body, and model the outfit and hair directly onto the figure.

Finally, attach the arms and reinforce the joints with small coils. Let the piece dry completely before decorating with acrylic paint or varnish.

Technique 3: Slabs

Design and build an elegant and original jewelry box.

Level: Advanced
Estimated time: 2 h
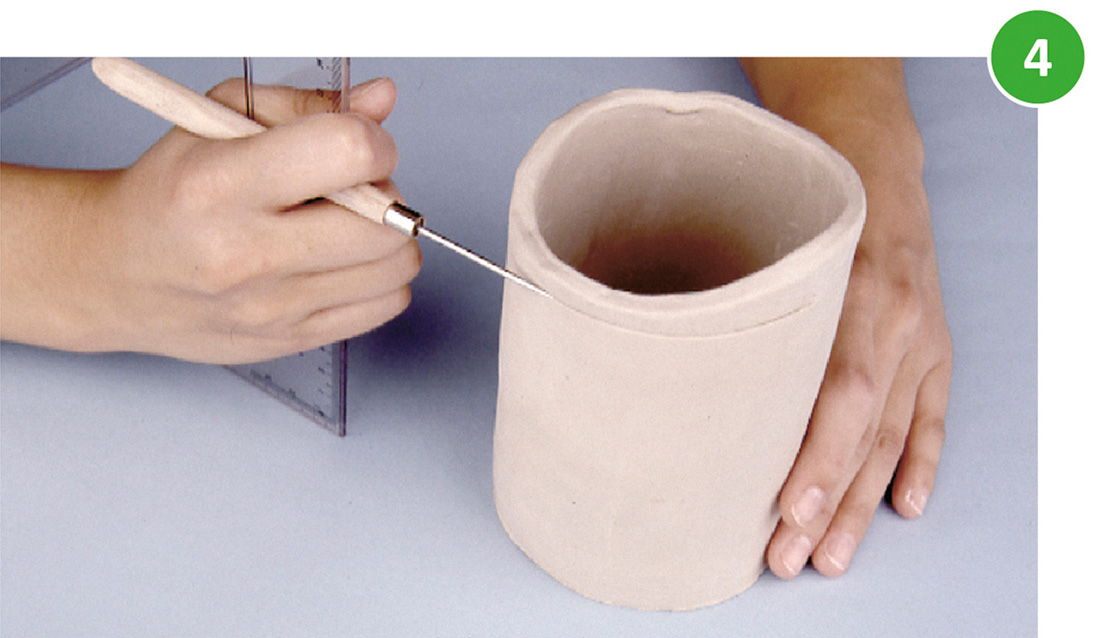
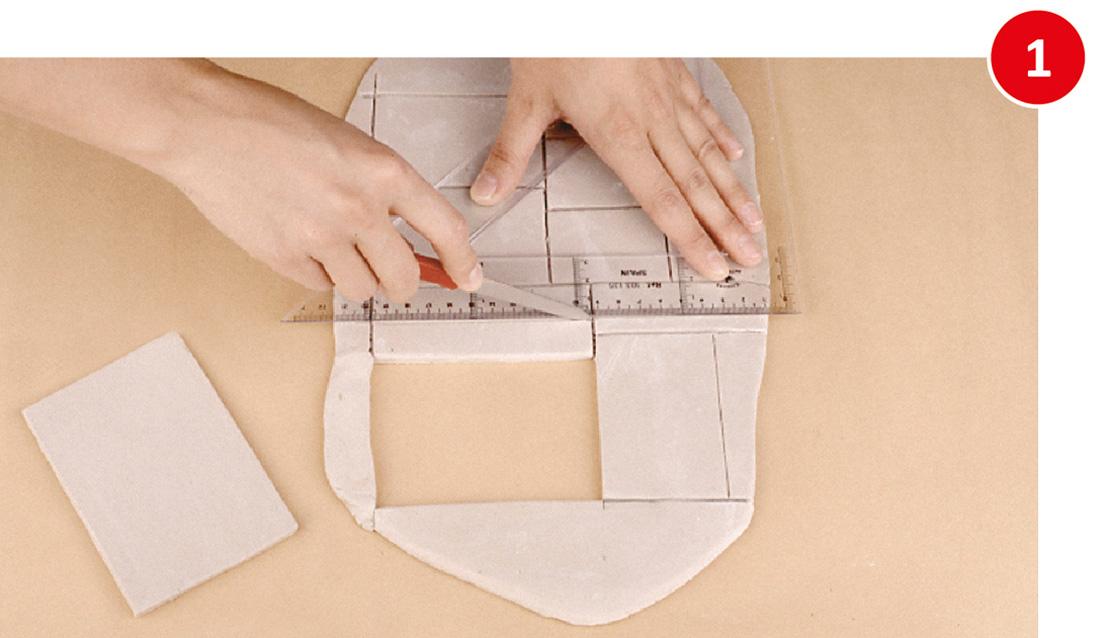
Tools: Wooden roller, ruler, scoring tool, spatula, brush, paint or varnish

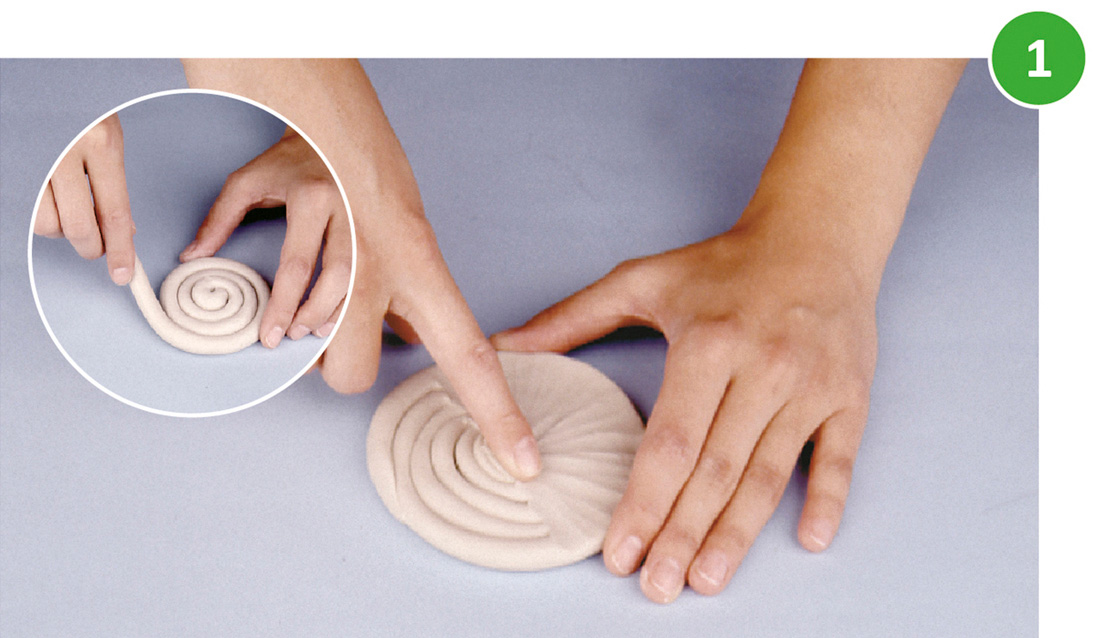
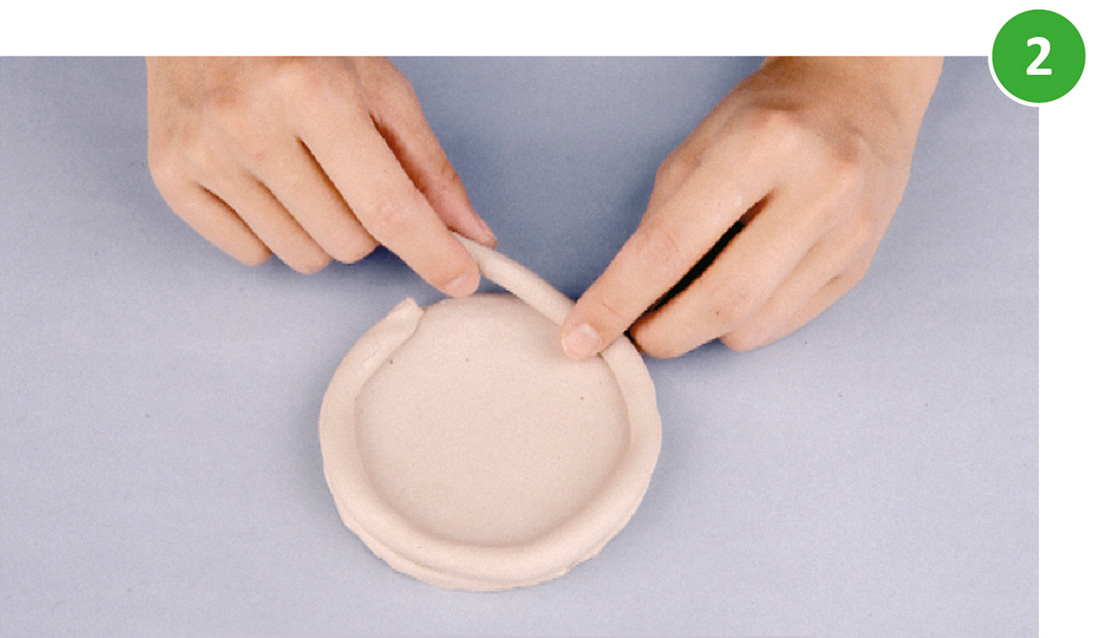
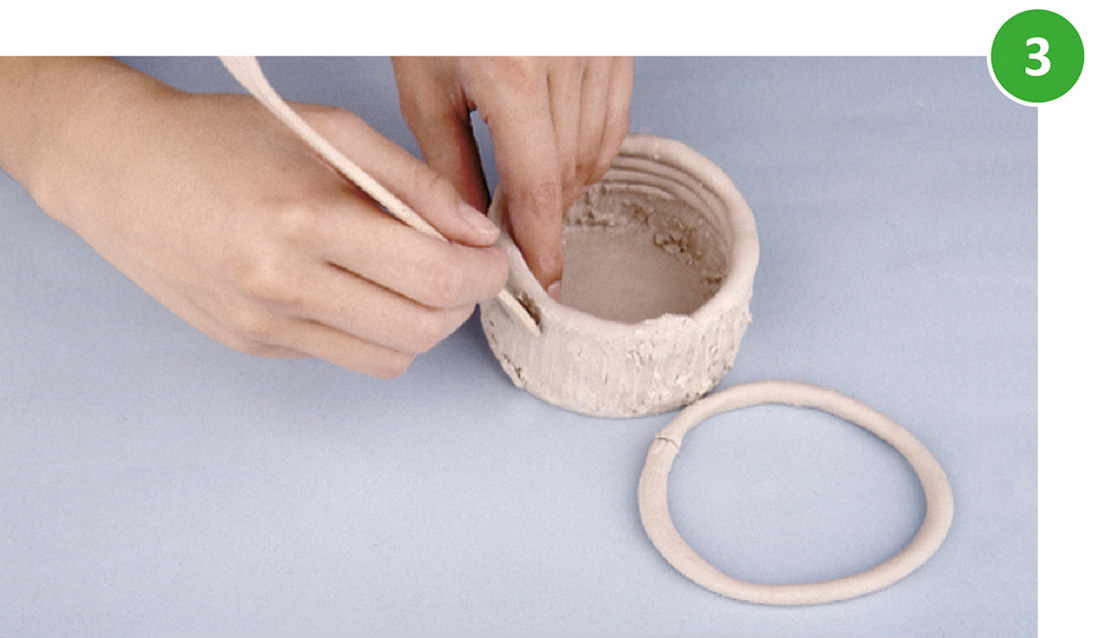
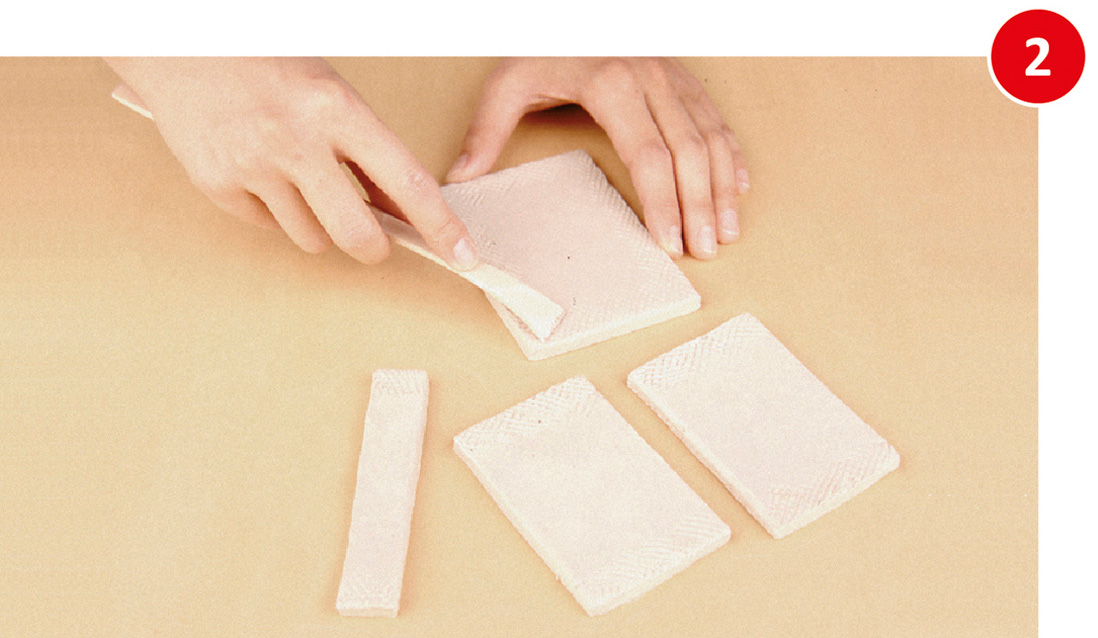
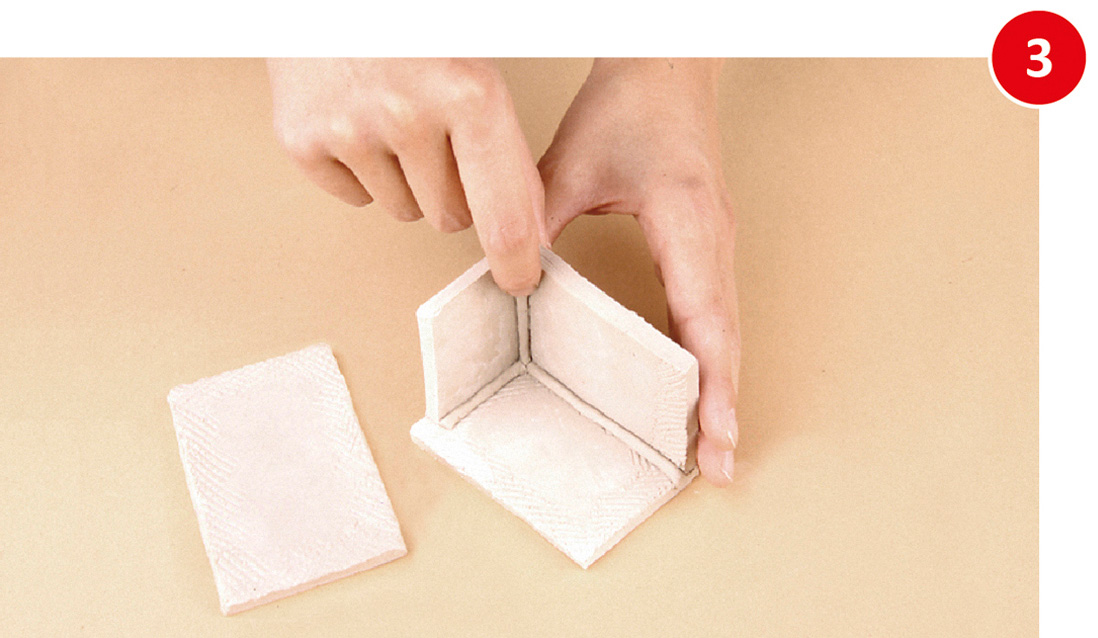
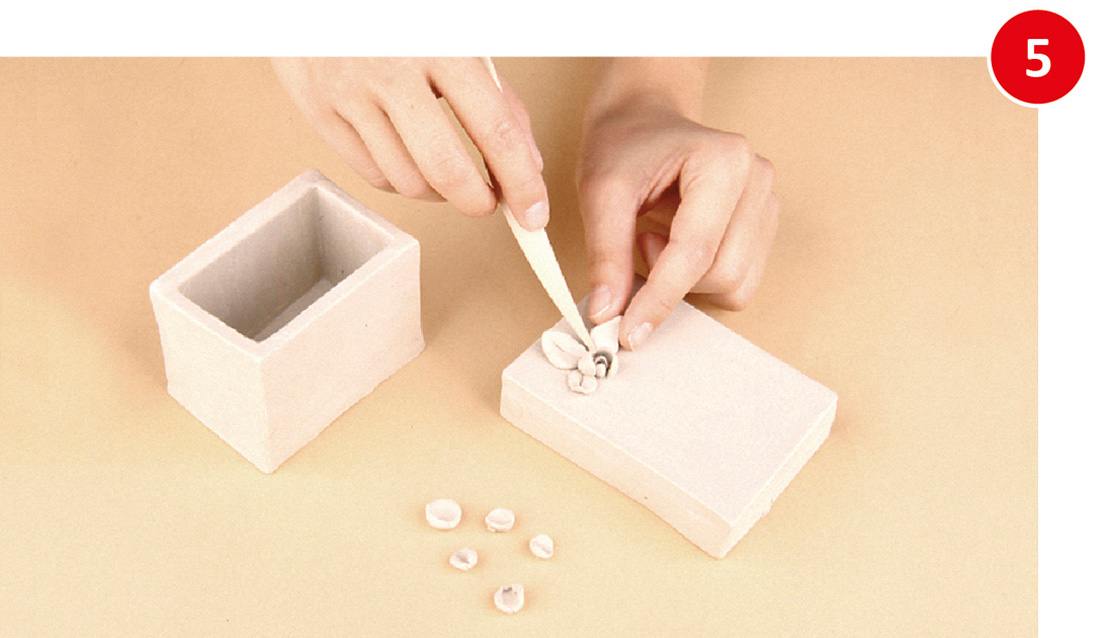
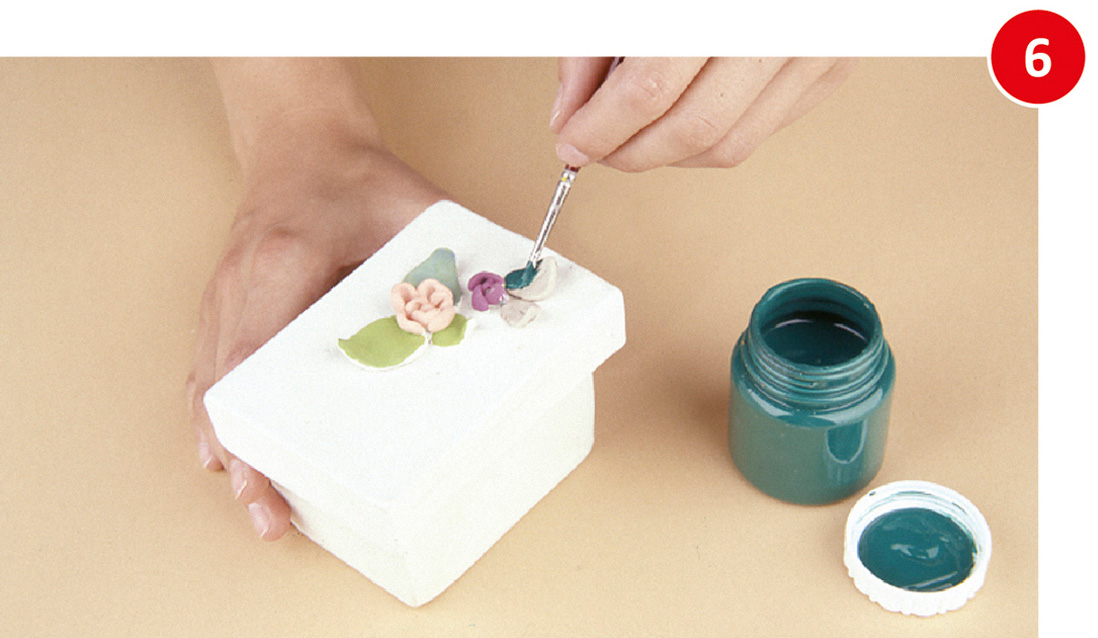
Master the slab technique by rolling out clay and assembling flat shapes. We'll guide you step by step to create a lidded jewelry box — perfect for storing little treasures. A project that will make you feel like a true ceramic artist!

On a slab of clay, mark and cut out all the pieces needed to form the box and its lid.

Use a spatula or a scoring tool to lightly scratch the areas that will be joined for better adhesion.

Assemble the box by joining the pieces and reinforcing all seams with thin coils.

Press, stretch and smooth the coils so they blend into the surface.

Make decorative flowers from small flattened balls and attach them to the lid, moistening the contact areas well.

Let the piece dry completely and decorate it as you like with acrylic paint or varnish.

You’ll find endless clay techniques and creative ideas on our Instagram @sio2.claycrafts

Comments (0)

No comments at this moment

New comment

You are replying to a comment

Product added to wishlist